Author: Miyabi

  • Japan Train Delay & Suspension Guide 2026: What to Do When Trains Stop (Delay Certificate, Refunds & Apps)

    Japan Train Delay & Suspension Guide 2026: What to Do When Trains Stop (Delay Certificate, Refunds & Apps)

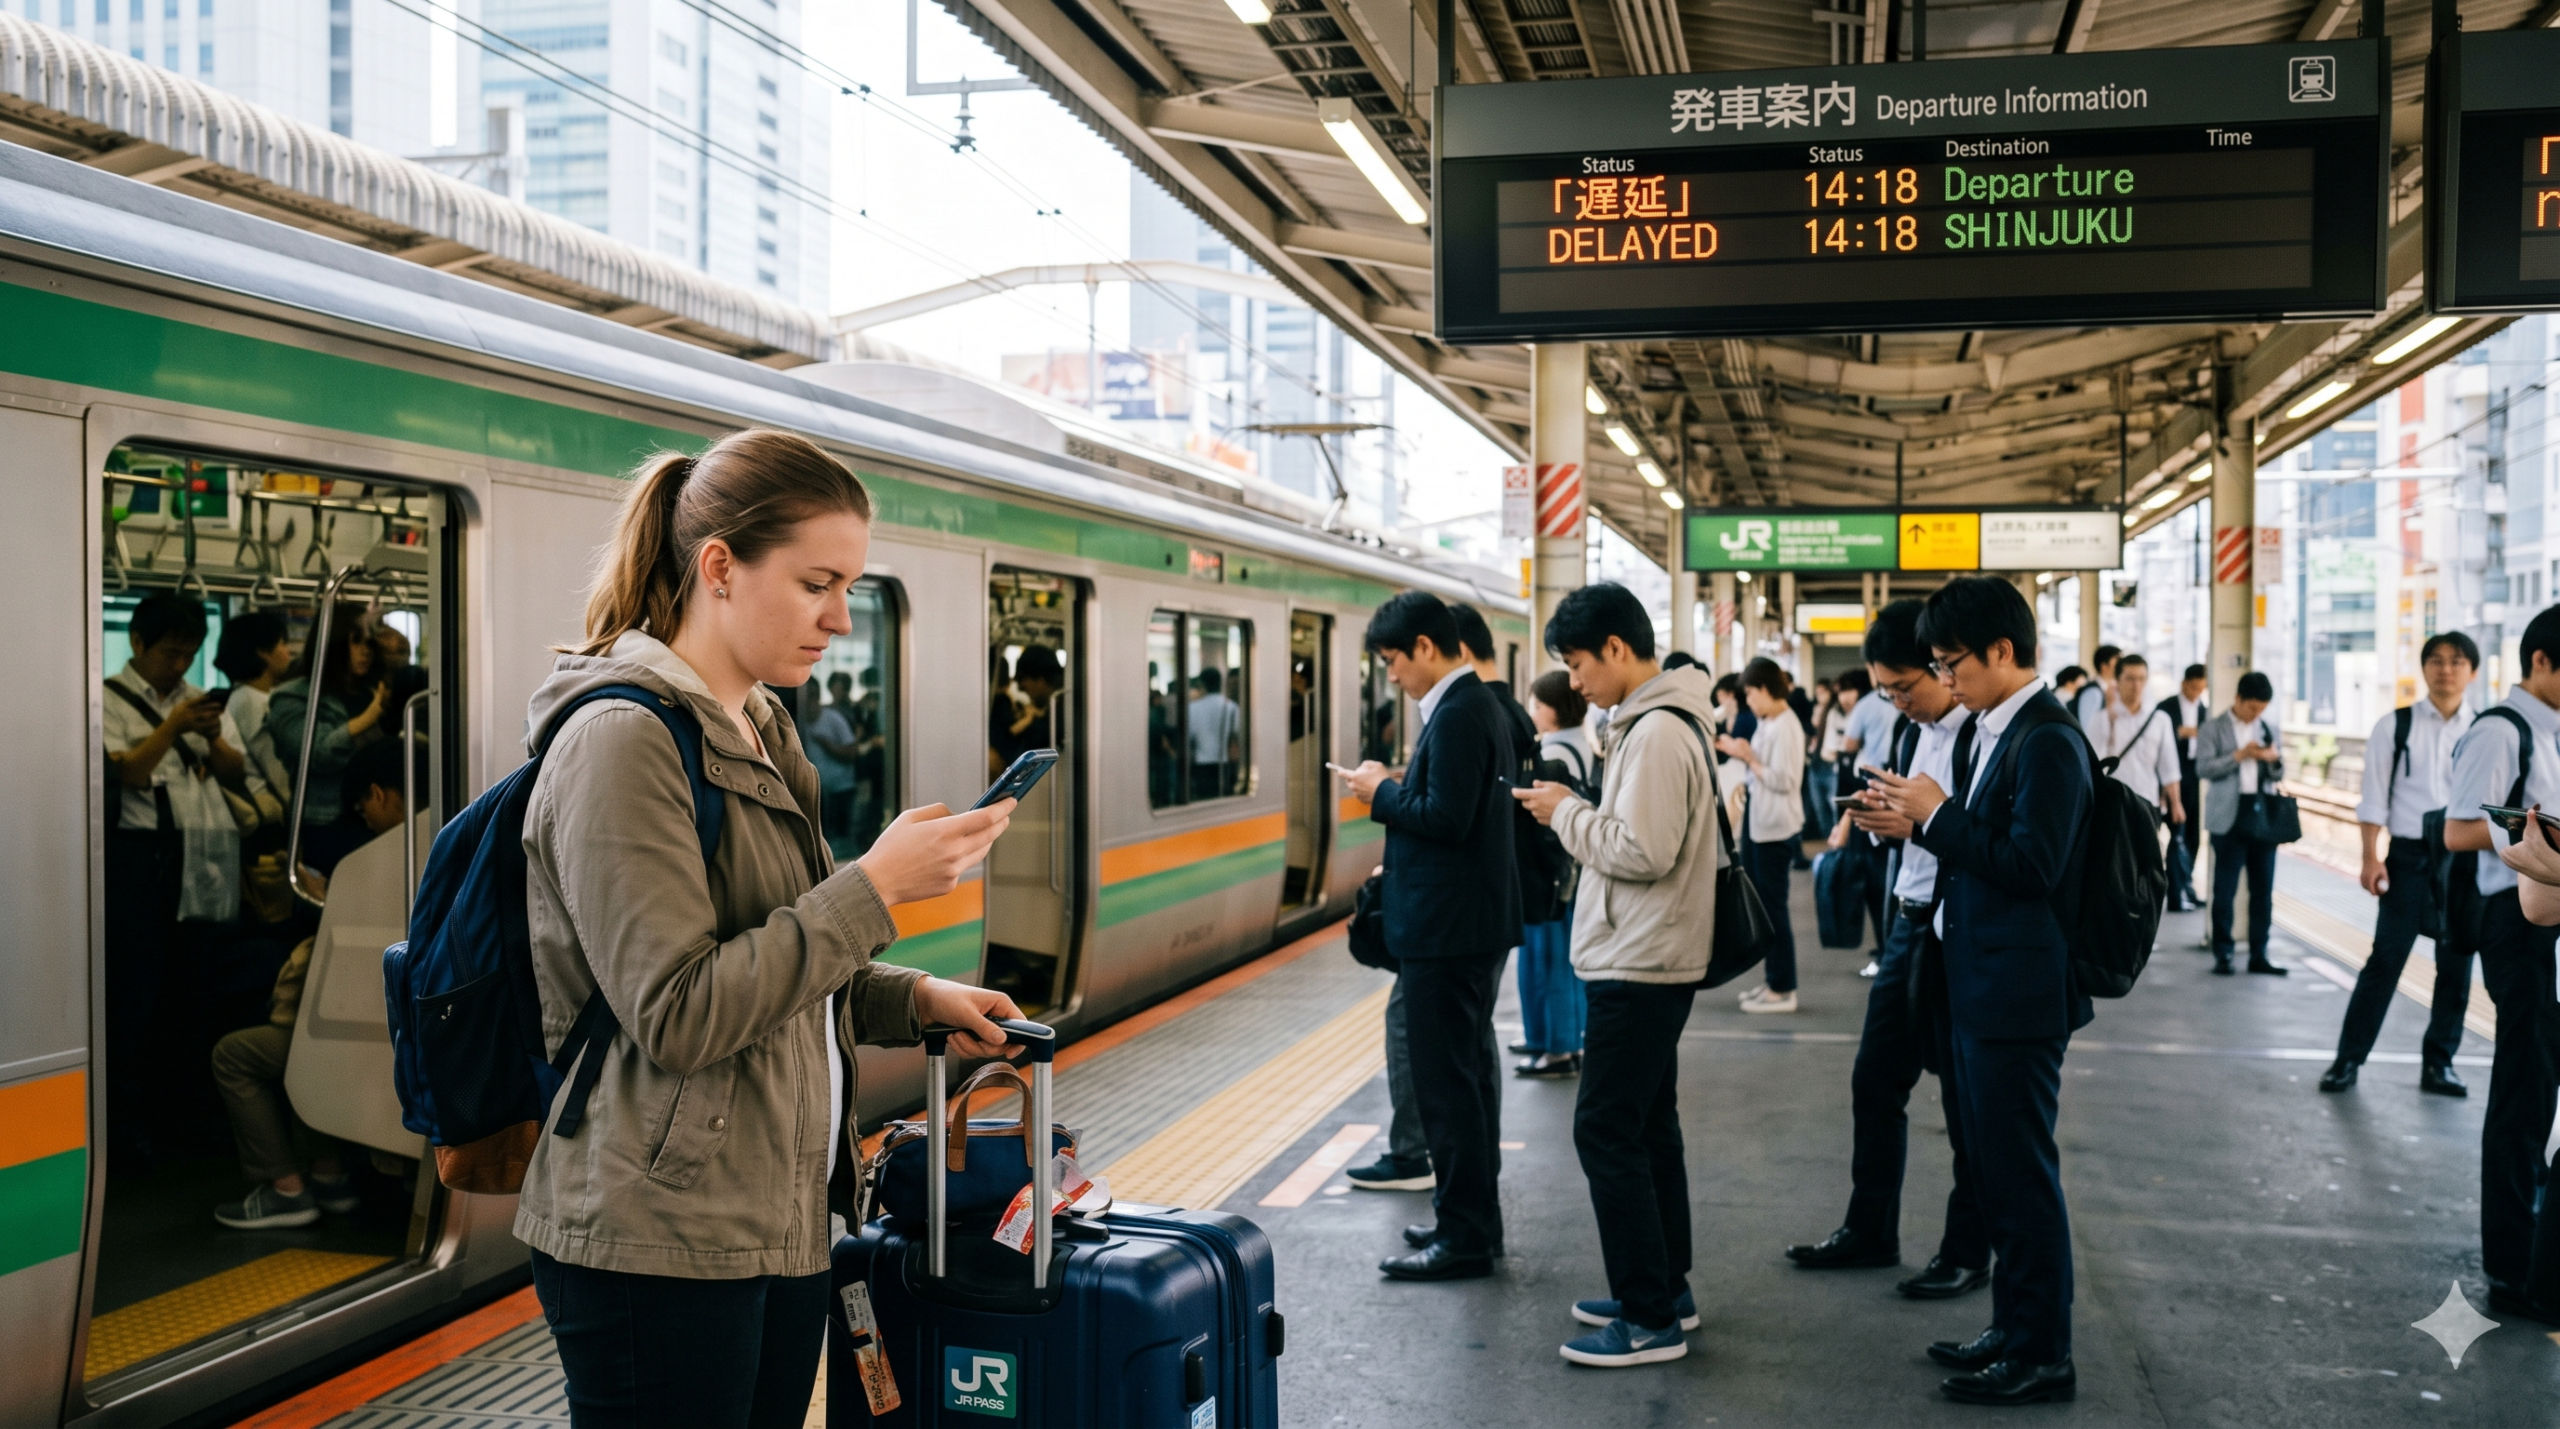
    You’re standing on a platform in Tokyo, your train isn’t moving, and an announcement crackles over the speakers β€” entirely in Japanese. Stressful, right? Japanese trains are famously punctual, but delays (遅廢) and full suspensions (ι‹θ»’θ¦‹εˆγ‚γ›) do happen, especially during the June–October rainy and typhoon season. The good news: the system is built to help you. Once you know the steps, a stopped train is just a minor detour. This guide shows you exactly what to do β€” read the announcements, check live status, get a delay certificate, use free alternative transport, and claim refunds β€” so you’re never stuck and confused again.

    First, understand the announcements

    A few keywords turn panic into a plan. These appear on station signs and in apps:

    JapaneseReadingMeaning
    遅廢chienDelay β€” trains late but still moving
    ι‹θ»’θ¦‹εˆγ‚γ›unten miawaseSuspension β€” trains temporarily stopped
    θ¨ˆη”»ι‹δΌ‘keikaku unkyuPlanned suspension β€” stopped in advance (typhoons)
    運軒再開unten saikaiService resumed
    ζŒ―ζ›ΏθΌΈι€furikae yusoAlternative transport β€” another line, same ticket
    ι…ε»Άθ¨Όζ˜Žζ›Έchien shomeishoDelay certificate (proof of lateness)

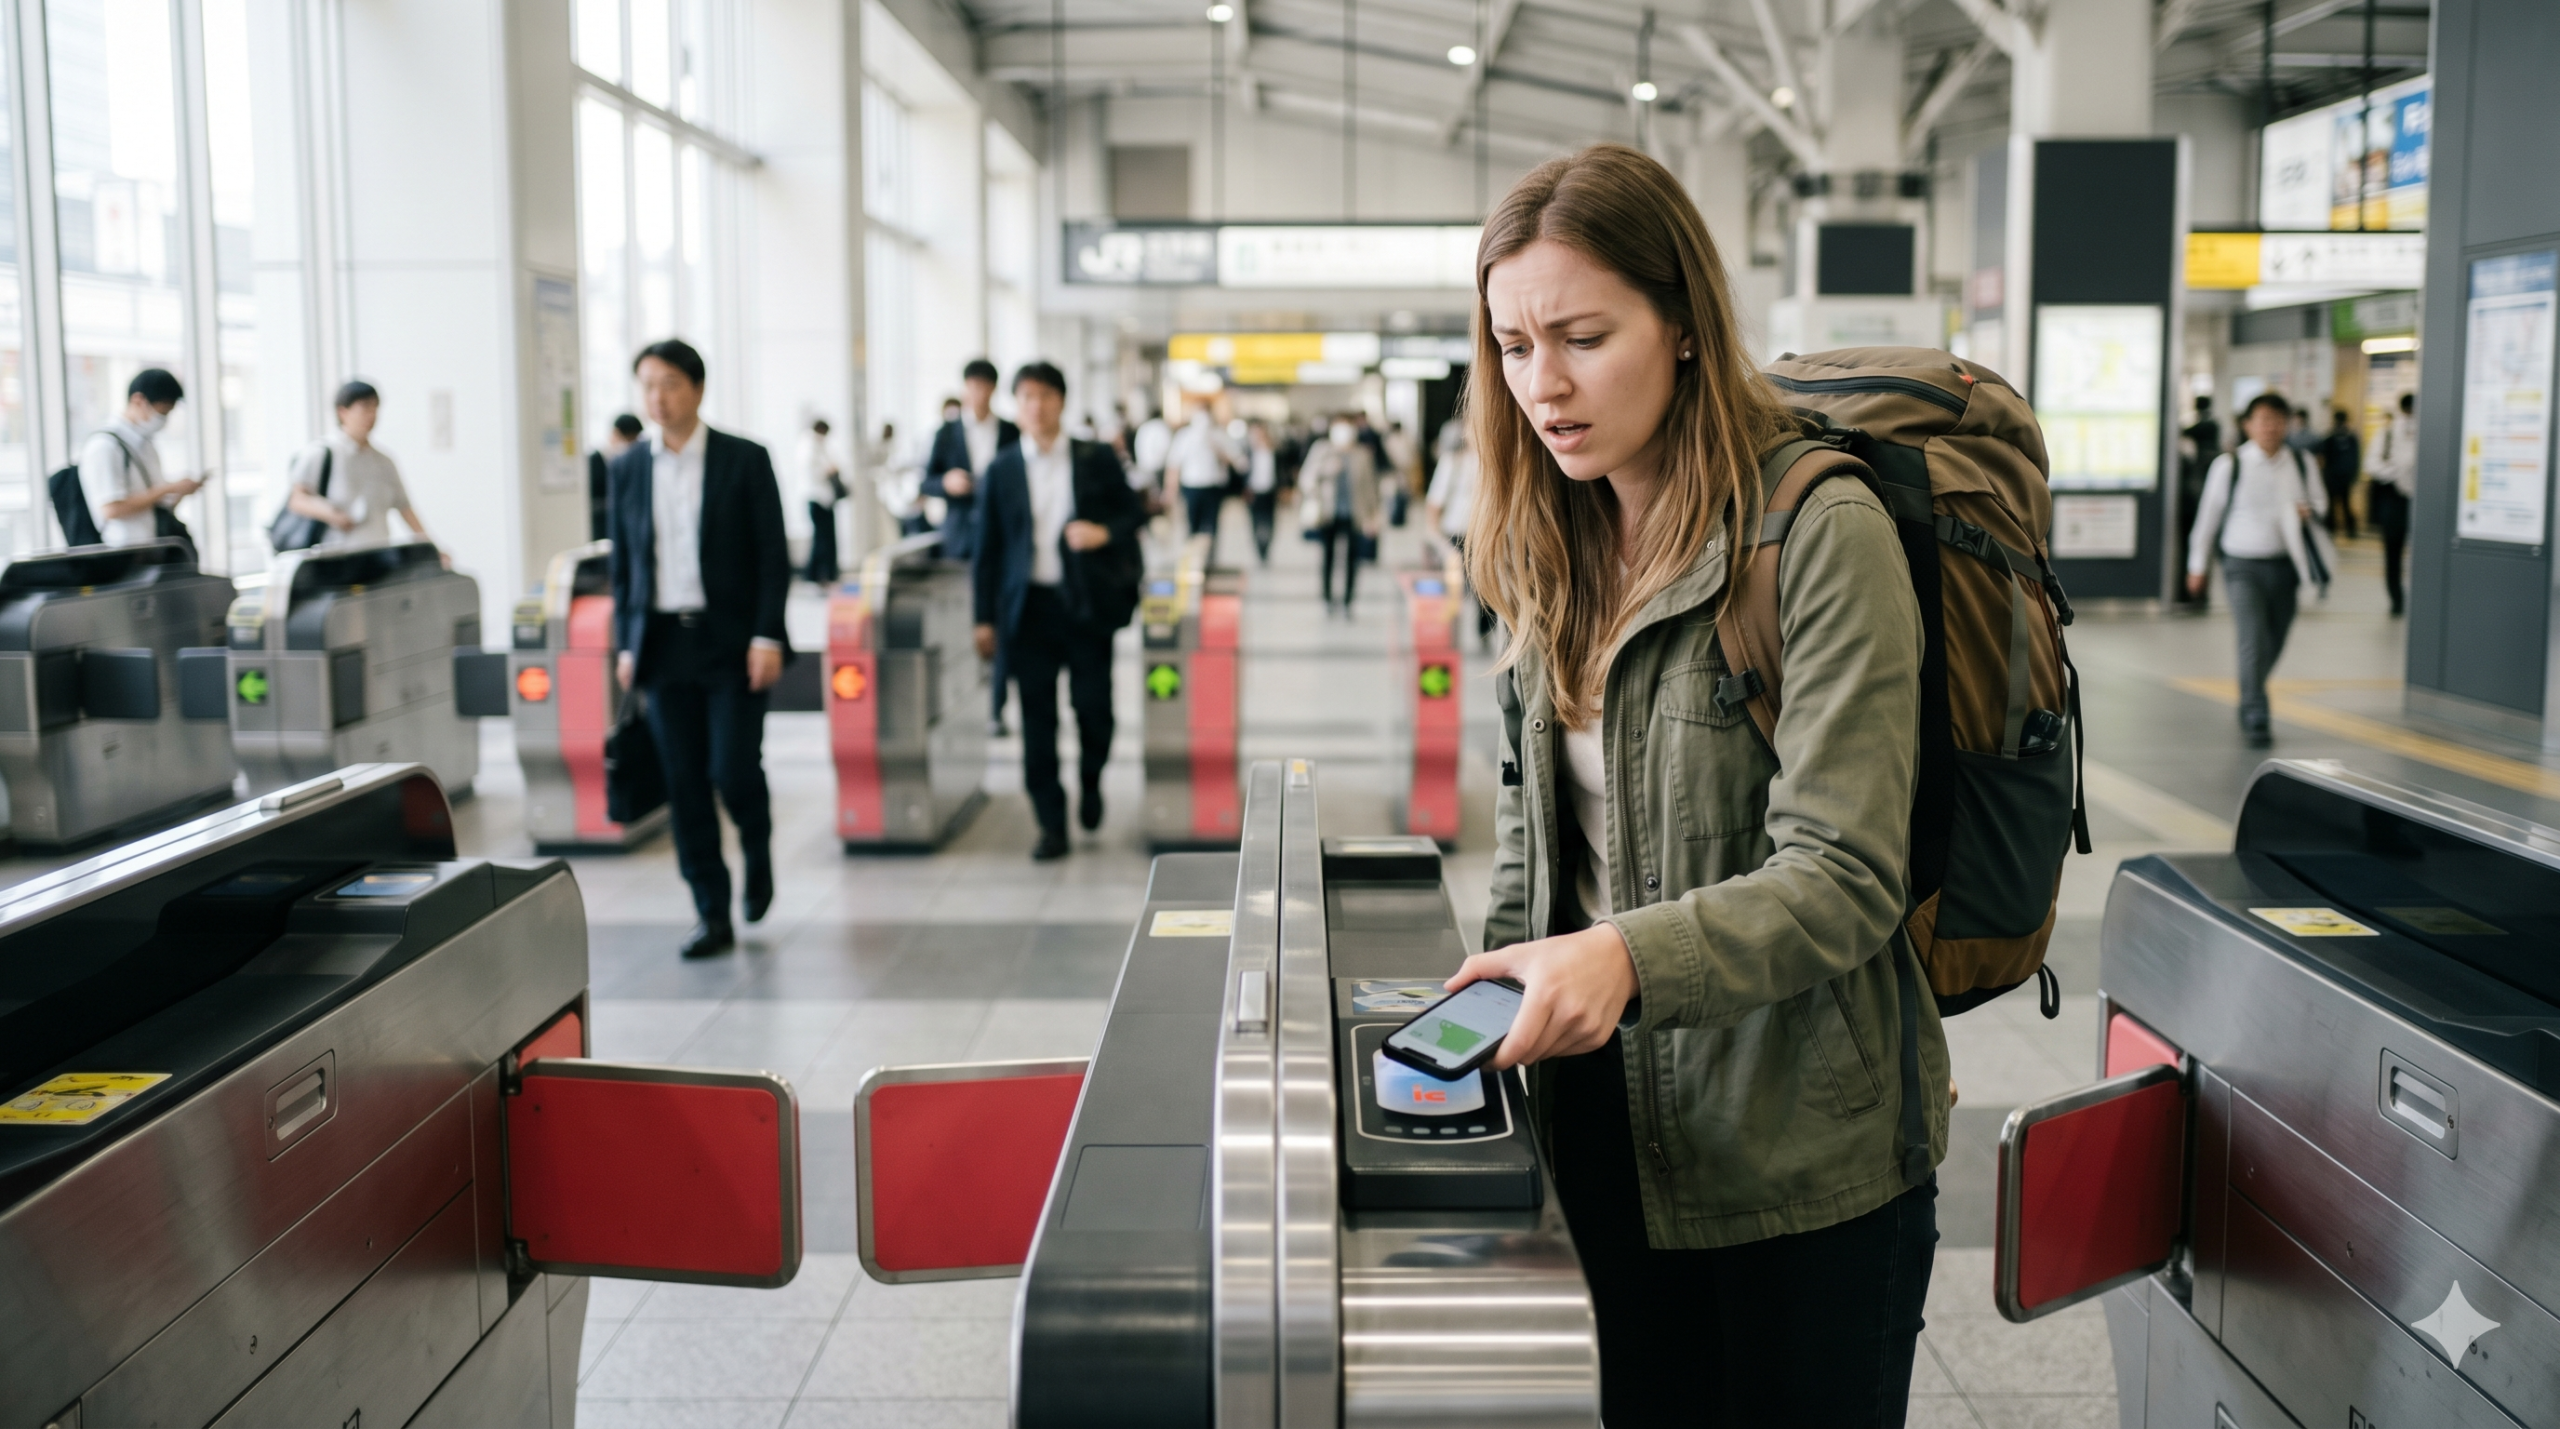
    Step 1: Check live status on your phone

    Before anything else, find out what’s happening and how long it will last. The fastest way is an English transit app:

    • Japan Transit Planner (Jorudan) / Yahoo Norikae Annai β€” live delay info and automatic rerouting around the stopped line.
    • NAVITIME for Japan Travel β€” English, with real-time disruption alerts.
    • Google Maps β€” transit mode flags major delays and suggests alternatives.
    • Official railway sites / X accounts β€” JR East, Tokyo Metro and others post the latest status, often in English.

    If the app says the suspension may last 30+ minutes, don’t just wait β€” go to Step 3 and take another route.

    Step 2: Get a delay certificate

    If the train made you late for work, school, an interview, or a tour, get a delay certificate β€” an official document proving the train ran late. Showing it is a completely accepted excuse for lateness in Japan, and no one will blame you.

    Big 2026 update: railways are going digital. From April 1, 2026, Tokyo Metro issues delay certificates online only (no more paper at the gate), and JR East and Tokyu also offer electronic certificates on their websites. So the easiest method now is:

    • Online (recommended): open the railway’s “delay certificate” web page, pick the date and line, and download or screenshot it. Usually issued for delays of 5+ minutes.
    • At the station: for companies that still hand them out, ask staff near the ticket gate. The phrase: “Chien shomeisho o kudasai.”

    Certificates are usually available only on the day of the delay (or a few days after, online), so act promptly.

    Step 3: Use free alternative transport (furikae yuso)

    When a line is suspended, railways often arrange alternative transport: ride a different company’s parallel line to your destination using your existing ticket β€” at no extra charge. Show your ticket or pass to staff and they’ll point you the right way.

    Catch for tourists: this mainly applies to paper tickets and commuter passes; rules for IC cards (Suica/PASMO) differ and sometimes you must speak to staff before tapping out. When unsure, ask an attendant: “Furikae yuso wa dekimasu ka?” If you tapped in with Suica, don’t tap out at a different company without asking, or you may be charged twice.

    Step 4: Refunds

    • Train fully suspended and you give up the trip: you can usually refund the unused ticket at the ticket window.
    • Limited Express / Shinkansen badly delayed: if a limited express arrives 2+ hours late, the express surcharge (not the base fare) is typically refunded β€” keep your ticket and ask at the window.
    • IC card: if you tapped in but couldn’t travel, staff can cancel the entry so you aren’t charged.

    Keep your ticket and go to the staffed ticket office, not the automatic gate, for refunds.

    Typhoon season: planned suspensions

    During typhoons and heavy rain (peaking June–October), railways announce planned suspensions a day or two ahead and stop service entirely for safety β€” exactly what happened during the early-season typhoon in June 2026. If a big storm is forecast:

    • Check railway websites and weather apps 1–2 days ahead; planned suspensions are announced early.
    • Avoid tight airport transfers on storm days β€” trains and airport rapid lines may stop.
    • If you must travel, go early; service often winds down hours before the peak and resumes slowly afterward.

    Be prepared: gadgets that save a stranded traveler

    Every step above needs a working phone with data. If your battery dies on a stopped platform, you can’t check routes, get a certificate, or call anyone. Two cheap items make all the difference.

    1. A compact power bank. Keep a 10,000mAh charger in your day bag so you can keep checking status during a long delay.

    2. Reliable mobile data (eSIM or pocket Wi-Fi). Delay apps are useless without internet β€” see our internet guide below to stay connected anywhere.

    Useful Japanese phrases for train trouble

    EnglishJapanese (romaji)
    Please give me a delay certificate.Chien shomeisho o kudasai.
    Can I use alternative transport?Furikae yuso wa dekimasu ka?
    When will service resume?Unten saikai wa itsu desu ka?
    I’d like a refund, please.Haraimodoshi o onegai shimasu.
    How do I get to ___?___ made do ikeba ii desu ka?

    FAQ

    Are Japanese trains really often delayed?

    No β€” they’re among the most punctual in the world. Minor delays of a few minutes can happen at rush hour; full suspensions are usually due to weather, accidents, or signal trouble. That’s exactly why the delay-certificate system exists.

    Does a delay certificate cost anything?

    No, it’s free β€” whether online or from staff.

    My Suica won’t let me exit after a suspension. What do I do?

    Go to the staffed gate (not the automatic one) and explain. Staff can correct the entry so you aren’t double-charged.

  • Pocket WiFi Not Working in Japan? How to Fix It Fast (2026 Guide)

    Pocket WiFi Not Working in Japan? How to Fix It Fast (2026 Guide)

    Pocket WiFi Not Working in Japan? How to Fix It Fast (2026)

    You rented a pocket WiFi for your Japan trip, powered it on, and… your phone still says no internet. A dead or disconnected pocket WiFi is a classic travel headache β€” no maps, no translation, no messaging. The good news: it’s rarely broken hardware. It’s usually a flat battery, a device that drifted out of range, or a setting you can fix in a minute.

    This 2026 guide walks through exactly why your pocket WiFi isn’t connecting in Japan, the step-by-step fixes, and how to make sure you always have a backup connection.

    ⏱️ The 60-second fix
    Check the pocket WiFi has battery and shows a signal, then on your phone go to Wi-Fi settings, forget the network and reconnect using the exact SSID and password printed on the device (or its card). Still nothing? Restart the pocket WiFi.

    Step 1: Check the device itself

    1. Is it charged and on? Pocket WiFi units drain fast. Plug it in β€” a flat battery is the #1 cause. Look for a power/signal light or screen.
    2. Does it show a mobile signal? Check the screen/indicator for bars (4G/5G). No bars means it can’t reach the network from where you are.
    3. Restart it. Power off for 10 seconds and on again β€” this re-attaches it to the Japanese network and clears most glitches.

    Step 2: Reconnect your phone correctly

    1. Open Wi-Fi settings on your phone and look for the pocket WiFi’s network name (SSID).
    2. Tap Forget the network, then reconnect, entering the SSID and password exactly as printed on the device or its sticker/card (passwords are case-sensitive).
    3. Some units have a second 5GHz network β€” try the other SSID if one won’t connect.
    4. Toggle your phone’s Wi-Fi off and on, or restart the phone.

    Step 3: Common reasons it won’t connect

    • Out of coverage: deep subway stations, rural areas, mountains and some buildings have weak signal. Move to a window or open area.
    • Too many devices: most pocket WiFi allows ~5–10 connections. Disconnect unused phones/laptops.
    • Data cap reached: many rentals throttle or stop after a daily/total limit. Check the plan; speed often resets the next day.
    • Not activated / SIM issue: a few units need activation, or the internal SIM has slipped β€” follow the rental’s instructions.

    Step 4: Get back online right now

    • Use free Wi-Fi at convenience stores, stations, cafes and your hotel as a stopgap.
    • Switch to a backup eSIM on your phone β€” instant data without depending on a separate device (this is why many travelers now carry an eSIM as well).
    • Contact the rental company’s support (many have 24/7 lines and prepaid return envelopes).

    Step 5: Avoid this next time

    • Carry a power bank β€” pocket WiFi batteries rarely last a full day of heavy use.
    • Have a backup eSIM installed before you fly, so a dead device never leaves you offline.
    • Note the SSID, password and support number somewhere offline (a photo works).

    πŸ“Ά Never lose connection in Japan

    An eSIM backup means a dead pocket WiFi never strands you. See our tested picks and full connectivity guide:

    Best eSIM Cards for Japan 2026Japan Internet Guide: Pocket WiFi vs eSIM vs SIM

    πŸ”’ Stay connected & secure on public Wi-Fi

    When your eSIM or pocket Wi-Fi fails, you’ll often fall back on public Wi-Fi at cafes, stations and airports β€” which is risky. ExpressVPN encrypts your connection and also unblocks Netflix, banking apps and home-country services while you’re in Japan. 30-day money-back guarantee.

    Try ExpressVPN β†’

    πŸ“Ά Skip the pocket WiFi headaches β€” use an eSIM

    If your pocket WiFi keeps dropping or running out of battery, an eSIM is a simpler, lighter alternative. Voye Global offers Japan eSIMs with nationwide 4G/5G, instant QR activation and 24/7 multilingual support β€” nothing to carry or charge.

    See Voye eSIM Plans β†’

    Frequently Asked Questions

    Why is my pocket WiFi not connecting in Japan?

    Most often the battery is flat, the device drifted out of mobile coverage, or your phone is using the wrong SSID/password. Charge and restart the device, check it shows a signal, then forget and rejoin the network using the exact credentials on the device.

    My pocket WiFi shows no signal β€” what do I do?

    It can’t reach the mobile network from your location (common in deep subways, rural areas or some buildings). Move near a window or outdoors, restart the device, and wait for it to re-attach. If it never gets a signal, contact the rental company.

    Why is my pocket WiFi suddenly slow?

    Many rental plans throttle speed after a daily or total data cap, or you may have too many devices connected. Disconnect unused devices; throttled speed often resets the next day. Check your plan’s data limit.

    What’s a good backup if the pocket WiFi fails?

    A travel eSIM on your phone is the best backup β€” it gives instant data without a separate device. Free Wi-Fi at convenience stores, stations and hotels also helps in a pinch.

  • Suica Not Working on iPhone in Japan? How to Fix It at the Gate (2026)

    Suica Not Working on iPhone in Japan? How to Fix It at the Gate (2026)

    Suica Not Working on iPhone? How to Fix It at the Gate (2026)

    You walk up to the ticket gate, tap your iPhone… and the gate slams shut with a beep. A Suica that won’t tap β€” or won’t recharge β€” is one of the most common (and stressful) tech snags for visitors to Japan. The good news: it’s almost never a broken card. It’s usually one setting (Express Transit) or the wrong credit card for top-ups, and both take under a minute to fix.

    This 2026 guide covers exactly why your Suica isn’t working on iPhone, how to fix tapping at the gate, why your card won’t recharge, and how to make sure you sail through every gate.

    ⏱️ The 30-second fix
    Set Suica as your Express Transit Card: Settings β†’ Wallet & Apple Pay β†’ Express Transit Card β†’ choose Suica. Then hold the TOP of your iPhone flat against the reader. Express Transit lets you tap without Face ID, Touch ID or even waking the phone.

    Step 1: Turn on Express Transit (the #1 reason gates reject your tap)

    If your iPhone makes you authenticate with Face ID before it’ll tap, the gate often times out and rejects you. Express Transit fixes this:

    1. Open Settings β†’ Wallet & Apple Pay.
    2. Tap Express Transit Card.
    3. Select your Suica (authenticate once with Face ID/Touch ID to confirm).
    4. Now you can tap without unlocking β€” just hold the phone to the reader.

    Step 2: Tap the right way

    • Hold the top of the iPhone flat against the reader panel (the NFC antenna is at the top).
    • Keep it there for a full second β€” don’t whip it away too fast.
    • Remove any thick metal case or stacked cards that can block NFC.
    • Make sure you’re not in Airplane Mode with everything off (Express Transit works even on low battery, but a fully dead phone won’t).

    Step 3: Can’t recharge? It’s usually your credit card

    A very common problem: you can add Suica but can’t top it up. The culprit is the card in Apple Wallet:

    1. Visa often fails for Suica top-ups in Apple Pay. Add a Mastercard or American Express to Apple Wallet and use that to recharge.
    2. Recharge inside the Suica app or via the Suica card in Apple Wallet (tap the card β†’ Add Money).
    3. If a foreign card still won’t load, recharge with cash at any station fare-adjustment/charge machine or a convenience store (7-Eleven, Lawson, FamilyMart).

    Step 4: Adding or transferring Suica problems

    • iPhone 8 or later (and Apple Watch Series 3+) supports Suica worldwide β€” older or certain region-locked models may not.
    • To add: open the Suica app or Apple Wallet β†’ + β†’ Transit Card β†’ Suica, and set up a new card (you don’t need a physical card).
    • Transferring a physical Suica into iPhone erases the plastic card β€” that’s normal.
    • Update to the latest iOS if adding fails.

    Step 5: Still stuck at the gate?

    • Low balance? You need enough for the minimum fare. Top up before tapping.
    • Use the staffed gate on the side and show staff β€” they’ll help adjust fare or let you through.
    • Restart the iPhone if the card has frozen or the reader won’t respond.
    • Keep a physical Suica/Pasmo or some cash as backup, especially in rural areas.

    πŸš† Get Japan-ready before you fly

    Set up Suica, data and a low-fee card before you land and you’ll glide through Japan. See our guides:

    How to Use Suica in Japan 2026Best eSIM Cards for Japan 2026

    Frequently Asked Questions

    Why won’t my Suica tap at the gate?

    Most often Express Transit isn’t enabled, so the iPhone asks for Face ID and the gate times out. Set Suica as your Express Transit Card in Settings β†’ Wallet & Apple Pay, and hold the top of the phone to the reader.

    Why can’t I recharge my Suica on iPhone?

    Visa cards frequently fail for Suica top-ups in Apple Pay. Add a Mastercard or American Express to Apple Wallet and recharge with that, or add money with cash at a station machine or convenience store.

    Which iPhones support Suica?

    iPhone 8 and later, and Apple Watch Series 3 and later, support Suica worldwide. Older models or some region-locked phones may not be able to add Suica.

    My iPhone battery died β€” can I still tap?

    Express Transit works in a low-power reserve mode for a while even after the phone appears off, but a fully drained battery won’t tap. Keep some charge, or carry a backup physical card or cash.

  • eSIM Not Working in Japan? How to Fix It Fast (2026 Guide)

    eSIM Not Working in Japan? How to Fix It Fast (2026 Guide)

    eSIM Not Working in Japan? How to Fix It Fast (2026)

    You landed in Japan, switched on your phone, and… no data. An eSIM that won’t connect is one of the most panic-inducing travel problems β€” no maps, no translation, no rideshare. The good news: in the vast majority of cases it’s not a broken eSIM, but a setting you can fix in two minutes once you know where to look.

    This 2026 guide walks you through exactly why your eSIM isn’t connecting in Japan and the step-by-step fixes β€” from data roaming and the right APN to manually picking a network β€” plus how to make sure you’re never offline again.

    ⏱️ The 60-second fix
    Turn ON Data Roaming for your eSIM line, set the eSIM as your line for cellular DATA, then toggle Airplane Mode on/off (or restart). 90% of “eSIM not working” issues are fixed by these three steps.

    Step 1: Check the three settings that fix it 90% of the time

    Before assuming the eSIM is faulty, confirm these β€” in this order:

    1. Turn ON Data Roaming for the eSIM line. A travel eSIM connects to a Japanese partner network, which counts as roaming. iPhone: Settings β†’ Cellular β†’ your eSIM plan β†’ Data Roaming ON. Android: Settings β†’ Network & internet β†’ SIMs β†’ eSIM β†’ Roaming ON.
    2. Set the eSIM as your data line. iPhone: Settings β†’ Cellular β†’ Cellular Data β†’ choose your eSIM. Android: SIMs β†’ Mobile data β†’ select the eSIM. Keep your home SIM for calls/texts if you want, but data must point to the eSIM.
    3. Toggle Airplane Mode on for 10 seconds, then off β€” or restart the phone. This forces it to re-scan and attach to a Japanese network.

    Step 2: Make sure the eSIM is installed and the plan is active

    • Install the eSIM BEFORE you arrive (you need Wi-Fi/data to download it). If you didn’t, connect to free airport or hotel Wi-Fi and install it now.
    • Check the plan is activated. Many eSIMs activate on first network connection in Japan, others need manual activation in the provider’s app. Confirm it shows “active” with remaining data.
    • Confirm the line is turned on. A freshly installed eSIM is sometimes left toggled off β€” enable the line in your cellular settings.

    Step 3: Fix the APN (if you have signal bars but no internet)

    If you see the carrier name/bars but pages won’t load, the APN may be wrong. Most major eSIMs auto-configure, but you can set it manually:

    • iPhone: Settings β†’ Cellular β†’ your eSIM β†’ Cellular Data Network β†’ APN.
    • Android: Settings β†’ Network β†’ SIMs β†’ eSIM β†’ Access Point Names.
    • Enter the APN your provider gave you (it’s in their app or confirmation email). Save, then toggle Airplane Mode. Leave username/password blank unless specified.

    Step 4: Manually select a network

    Japan’s main networks are NTT DOCOMO, SoftBank, au (KDDI) and Rakuten. If auto-selection fails:

    1. Go to Settings β†’ Cellular/Mobile β†’ Network Selection and turn OFF automatic.
    2. Pick the network your eSIM partners with (DOCOMO and SoftBank are the most common partners).
    3. If unsure, try them one by one β€” choosing the right partner network often fixes a stuck eSIM.

    Step 5: Still offline? Run through this checklist

    • Phone unlocked & eSIM-compatible? A carrier-locked phone won’t accept another network’s eSIM. Most phones from 2019+ support eSIM, but check yours.
    • Enough data left? Confirm balance in the provider app; top up if depleted.
    • Correct dates? Some plans only start on a set date or on first use β€” check it hasn’t expired or not yet begun.
    • Try 4G/LTE instead of 5G if 5G is unstable in your area.
    • Contact provider support (Airalo, Ubigi, Saily, etc. have 24/7 chat) β€” and keep a backup option ready.

    πŸ“Ά Never get stuck offline in Japan

    Choosing a reliable eSIM (and a backup) is the best insurance against losing data on your trip. See our tested picks:

    Best eSIM Cards for Japan 2026Japan Internet Guide: Pocket WiFi vs eSIM vs SIM

    πŸ”’ Stay connected & secure on public Wi-Fi

    When your eSIM or pocket Wi-Fi fails, you’ll often fall back on public Wi-Fi at cafes, stations and airports β€” which is risky. ExpressVPN encrypts your connection and also unblocks Netflix, banking apps and home-country services while you’re in Japan. 30-day money-back guarantee.

    Try ExpressVPN β†’

    πŸ“Ά Still stuck? Switch to a reliable eSIM

    If your current eSIM keeps failing, the simplest fix is a dependable provider. Voye Global offers Japan eSIMs with nationwide 4G/5G, instant QR activation and 24/7 multilingual support β€” delivered by email in minutes, no physical SIM.

    See Voye eSIM Plans β†’

    Frequently Asked Questions

    Why won’t my eSIM connect in Japan?

    Most often because Data Roaming is off, the eSIM isn’t set as your data line, or the phone needs a restart to attach to a Japanese network. Turn roaming ON, select the eSIM for cellular data, and toggle Airplane Mode. If you have bars but no internet, fix the APN.

    Do I need data roaming on for a Japan eSIM?

    Yes. A travel eSIM uses a Japanese partner network, which technically counts as roaming, so Data Roaming must be ON for that eSIM line. This does not incur extra charges on a prepaid travel eSIM.

    Can I install the eSIM after arriving in Japan?

    You need an internet connection to install/activate an eSIM, so it’s best to install before departure. If you’ve already arrived, connect to free airport or hotel Wi-Fi to download and activate it.

    My phone shows signal but no internet β€” why?

    That usually means the APN is misconfigured. Enter the APN provided by your eSIM company in your cellular data network settings, save, and restart. Also confirm your plan is active with remaining data.

  • Foreign Card Declined at a Japan ATM? How to Get Cash (2026 Guide)

    Foreign Card Declined at a Japan ATM? How to Get Cash (2026 Guide)

    Foreign Card Declined at a Japan ATM? How to Actually Get Cash (2026)

    Japan is still a surprisingly cash-based country, and nothing is more stressful than standing at an ATM that keeps rejecting your perfectly good card. The catch: many Japanese bank ATMs simply don’t accept foreign-issued cards at all. The good news β€” once you know which ATMs to use and one crucial setting to refuse, withdrawing yen with a foreign card is quick and reliable.

    This 2026 guide shows you exactly where to withdraw, why your card gets declined, the step-by-step screens, the fees, and how to never get caught cashless again.

    ⏱️ The quick fix
    Use a 7-Eleven (Seven Bank) or Japan Post Bank ATM β€” they take foreign cards with English menus. Make sure your card is enabled for overseas withdrawals, and when asked, DECLINE conversion to your home currency (choose to be charged in yen).

    Step 1: Use the right ATM (most Japanese bank ATMs won’t work)

    Many local bank ATMs reject foreign cards. Head straight for the two that reliably work nationwide:

    • 7-Eleven / Seven Bank ATMs β€” 28,000+ locations, open 24/7, full English support, and accept Visa, Plus, Mastercard, Maestro, Cirrus, UnionPay, American Express and JCB. The easiest option for tourists.
    • Japan Post Bank (Yucho) ATMs β€” in post offices nationwide, English menus, accept the major networks too (hours can be limited).
    • AEON, and some major-bank international ATMs also work. Look for the network logos (Plus/Cirrus) on the machine.

    Step 2: Why your card is being declined

    If a 7-Eleven ATM still rejects your card, it’s usually one of these β€” not a broken machine:

    1. Overseas/ATM withdrawals not enabled: many banks block foreign ATM use by default. Call your bank or toggle it on in your banking app.
    2. No travel notice / fraud block: your bank flagged a foreign transaction. Notify them you’re in Japan.
    3. Wrong PIN: you need your 4-digit numeric PIN. Cards with no PIN, or 6-digit PINs, often fail.
    4. Daily limit reached, card expired, or insufficient funds.
    5. Magnetic-stripe-only or unsupported network: chip/contactless cards on Visa/Mastercard/Plus/Cirrus work best.

    Step 3: How to withdraw β€” and the one screen to watch

    At a Seven Bank ATM:

    1. Insert your card and choose English (the language option appears after inserting).
    2. Select Withdrawal, then account type (try Savings/Checking β€” usually ‘Savings’).
    3. Enter the amount and your 4-digit PIN.
    4. IMPORTANT: if asked to be charged in your home currency (Dynamic Currency Conversion / DCC), DECLINE it β€” choose to pay in Japanese yen. DCC adds a poor exchange rate and hidden markup.
    5. Take your cash, card and receipt.

    Step 4: Fees & withdrawal limits

    • Seven Bank: often free on Mastercard/Maestro; roughly Β₯110–Β₯220 ATM fee on Visa depending on amount.
    • Japan Post Bank: up to ~Β₯220 per transaction, with a per-withdrawal limit around Β₯50,000.
    • Your home bank may add its own foreign-ATM and FX fees β€” a low-fee travel card avoids most of these.

    Step 5: If it still won’t work β€” and how to never be stuck

    • Try a different card (carry a Visa and a Mastercard) and a different ATM brand.
    • Pay cashless where you can β€” many shops take Visa/Mastercard contactless, PayPay, and IC cards (Suica/Pasmo).
    • Get a low-fee travel card (e.g. Wise / Revolut) with overseas withdrawals enabled and a 4-digit PIN set before you travel.
    • Always carry some backup cash β€” small shops, shrines and rural areas are often cash-only.

    πŸ’³ Avoid card trouble β€” set up the right card & connectivity

    A low-fee card and a backup eSIM mean you’re never stranded without cash or data in Japan. See our guides:

    Best Credit Cards for Foreigners in JapanBest eSIM Cards for Japan

    πŸ’Έ Never get stuck without cash again

    A Wise account gives you a multi-currency debit card that works at Japanese ATMs (like 7-Eleven), with the real exchange rate and low fees. Many foreigners use it as a reliable backup when their home card gets declined.

    Open a free Wise account β†’

    Frequently Asked Questions

    Which ATMs in Japan accept foreign cards?

    7-Eleven (Seven Bank) and Japan Post Bank ATMs are the most reliable, with English menus and support for Visa, Plus, Mastercard, Maestro, Cirrus, UnionPay, Amex and JCB. Many local bank ATMs do not accept foreign cards.

    Why does the 7-Eleven ATM reject my card?

    Usually because overseas/ATM withdrawals aren’t enabled on your card, your bank flagged it as fraud, you entered a non-4-digit PIN, or you hit a daily limit. Enable international use and set a 4-digit PIN before traveling.

    Should I choose to pay in my home currency at the ATM?

    No. Always decline Dynamic Currency Conversion (DCC) and choose to be charged in Japanese yen. DCC uses a worse exchange rate and adds a hidden markup.

    How much can I withdraw and what are the fees?

    Seven Bank is often free on Mastercard/Maestro and around Β₯110–Β₯220 on Visa; Japan Post charges up to ~Β₯220 with roughly a Β₯50,000 per-withdrawal limit. Your home bank may add its own fees, which a low-fee travel card minimizes.

  • Lost or Stolen Phone in Japan: What to Do (2026 Step-by-Step Guide)

    Lost or Stolen Phone in Japan: What to Do (2026 Step-by-Step Guide)

    Lost or Stolen Phone in Japan? Here’s Exactly What to Do (2026)

    Losing your phone is stressful anywhere β€” but in Japan you actually have a real chance of getting it back. Japan’s famous lost-and-found culture means most found phones are handed in to the police, and a nationwide AI matching system (live since 2023) has already reunited hundreds of thousands of lost items with their owners. Recovery rates average around 30% when you report within 24 hours.

    That said, you need to act fast and in the right order β€” both to recover the device and to protect your data, money and accounts. This step-by-step guide (updated for 2026) walks tourists and residents through exactly what to do, including the English-language police lines you can call.

    ⏱️ Do these 3 things in the first 30 minutes
    1) Lock & locate your phone remotely. 2) Suspend your SIM/eSIM line with your carrier. 3) Change your Apple ID / Google and banking passwords. Then file a police report.

    Step 1: Lock, locate & protect your data (right now)

    Before anything else, use another device or computer to secure your phone remotely. This stops a thief from accessing your accounts and may help you find it.

    1. iPhone: Go to iCloud.com β†’ Find My iPhone β†’ select your device β†’ enable Lost Mode (locks it, shows a message + contact number). Use Erase only as a last resort.
    2. Android: Go to android.com/find (Google Find My Device) β†’ Secure device (locks it and shows a message). You can also play a sound or erase.
    3. Change key passwords immediately: Apple ID / Google account, then banking and payment apps (PayPay, etc.).
    4. Note your IMEI (dial *#06# on any phone, or check the box/Apple ID/Google account). Police and your carrier will ask for it.

    Step 2: Suspend your line (SIM / eSIM)

    Call your mobile carrier as soon as possible to suspend your line and block the IMEI. This prevents fraudulent calls, data use and SMS-based account takeovers. For travelers on a Japanese eSIM or pocket Wi-Fi, contact that provider’s support to suspend service.

    Tip: if your phone is your only way to make calls, borrow a friend’s phone, use a hotel phone, or use any device on Wi-Fi with an internet-calling app.

    Step 3: File a police report at a koban (within 24 hours)

    Go to the nearest koban (police box) or police station and file a lost/theft report. This is essential β€” you’ll need the report for insurance claims, carrier requests, and to claim the phone if it’s found.

    What to bring & say

    • Your passport or residence card (for ID).
    • Your phone’s IMEI number, model, color and any distinctive marks (case, scratches, stickers).
    • Where and roughly when you lost it.

    The police will issue a 受理η•ͺ号 (juri-bangō) β€” a case/receipt number. Keep it; it’s required for insurance and carrier follow-up.

    English help for tourists

    • Tourist police / English assistance: 03-3501-0110
    • Interpreter helpline: 03-3503-8111
    • Emergencies (theft in progress, danger): dial 110 for police.

    Step 4: Check lost & found (you’ll likely get it back)

    Japan’s return culture is real β€” found phones are legally required to be handed to police if not returned to the venue. Check these in order:

    1. The last place you were: station office, restaurant, taxi company, shop. Staff hold items before passing them to police.
    2. Train line lost & found: each railway has a lost-property center; many now feed into a shared AI matching database.
    3. Police Lost & Found Center: e.g. the Tokyo Metropolitan Police Lost and Found Centre catalogs recovered property and matches it for ~3 months.

    Since 2023, around 30 organizations (railways, airports, police) share an AI-powered lost-item platform that has logged over 1.5 million items and returned nearly 480,000 β€” so report everywhere and check back.

    Step 5: If it’s gone β€” recover connectivity & prevent next time

    If the phone isn’t recovered, file your insurance claim with the police case number, and get back online fast so you can navigate, translate and pay.

    • Get an eSIM on a spare/old phone or a pocket Wi-Fi rental to restore data instantly.
    • Restore from your cloud backup (iCloud / Google) onto a replacement device.
    • For next time: enable Find My, keep a written note of your IMEI, use a cloud backup, and carry a power bank so your phone never dies at the worst moment.

    πŸ“Ά Stay connected β€” backup options for Japan

    A backup eSIM or pocket Wi-Fi means you’re never stranded if your phone is lost or dies. See our guides:

    Best eSIM Cards for JapanPocket WiFi vs eSIM vs SIM

    Frequently Asked Questions

    Will I really get my lost phone back in Japan?

    Often, yes. Japan has an exceptionally high return rate and a legal duty to hand found items to police. Reporting within 24 hours gives roughly a 30% recovery rate on phones, and a nationwide AI matching system improves your odds β€” so report everywhere and check back.

    I’m a tourist and don’t speak Japanese. Who do I call?

    Call the tourist/English police line at 03-3501-0110, or the interpreter helpline at 03-3503-8111. For an emergency or theft in progress, dial 110. Many koban can also arrange an interpreter.

    What is a 受理η•ͺ号 (juri-bangō) and why do I need it?

    It’s the case/receipt number the police give you when you file a lost or theft report. You need it for travel-insurance claims, for your carrier, and to collect the phone if it’s found. Keep it safe.

    Should I erase my phone remotely?

    Lock it first (Lost Mode / Secure device) so it can still be located and returned. Only fully erase it as a last resort if it holds highly sensitive data and you’ve given up on recovery, because erasing can make tracking harder.

  • Best Japanese Teaware 2026: 5 Top Picks (Kyusu Teapots, Tetsubin & Matcha Sets)

    Best Japanese Teaware 2026: 5 Top Picks (Kyusu Teapots, Tetsubin & Matcha Sets)

    Why Japanese Teaware Transforms Your Tea Ritual in 2026

    If you’ve fallen in love with Japanese matcha or sencha, the right teaware takes the experience to another level. A proper Japanese teapot (kyusu), a beautiful matcha bowl, or a cast-iron tetsubin doesn’t just look gorgeous β€” it brews better-tasting tea, with finer mesh filters, ideal heat retention, and centuries of craftsmanship behind every piece.

    From heat-resistant glass teapots to traditional Tokoname clay kyusu and iconic Nambu cast-iron tetsubin, Japan makes the most refined tea tools in the world. This guide explains how to choose teaware and recommends 5 outstanding pieces for 2026 β€” all available worldwide via Amazon and Buyee. (Pairs perfectly with our guide to the best Japanese matcha & green tea.)

    How to Choose Japanese Teaware

    Kyusu (teapot) types: glass, clay, or porcelain

    A glass kyusu lets you watch the leaves unfurl and is easy to clean β€” great for beginners. A Tokoname or Banko clay kyusu subtly improves the taste of sencha over time as the clay seasons. Porcelain is neutral and versatile. Choose glass for ease, clay for the deepest sencha flavor.

    Filter type matters

    For Japanese green teas with fine leaves, a built-in fine ceramic mesh or stainless ‘sasame’ filter is essential to keep leaves out of your cup. Side-handle kyusu with integrated mesh pour cleanly and are the classic choice for sencha and gyokuro.

    Matcha needs its own tools

    Matcha isn’t steeped β€” it’s whisked. A proper matcha set includes a chawan (wide bowl), a chasen (bamboo whisk, ideally 80+ prongs), and a chashaku (bamboo scoop). These create the smooth, frothy texture that defines good matcha.

    Tetsubin (cast iron) vs. kyusu

    A Nambu tetsubin (cast-iron kettle/teapot) retains heat beautifully and can be a stunning centerpiece. Note: enamel-lined versions are for serving tea; un-lined tetsubin are for boiling water. Cast iron is heavier and needs careful drying to avoid rust.

    Size and care

    Pick a teapot size for how you drink β€” 300–360ml suits 1–2 people. Hand-wash teaware (no soap for clay/cast iron), dry thoroughly, and never put clay or cast iron in the dishwasher. With care, quality Japanese teaware lasts a lifetime.

    The 5 Best Japanese Teaware Picks in 2026

    1. Hario Chacha Kyusu Maru β€” Best Glass Teapot for Beginners

    Hario’s heat-resistant borosilicate glass teapot is the perfect starting point for Japanese tea. The clear glass lets you watch the leaves bloom and judge the brew color, while the fine stainless mesh filter keeps even tiny sencha leaves out of your cup.

    Microwave-safe and easy to clean, the Chacha Kyusu Maru is versatile for sencha, hojicha, and herbal teas alike. Affordable, elegant, and beginner-friendly β€” it’s the easiest way to start brewing Japanese tea properly.

    MaterialHeat-resistant glass
    FilterFine stainless mesh
    Capacityapprox. 300–700ml options
    CareEasy to clean, microwave-safe
    MakerHario

    βœ… Pros

    • See the leaves bloom through clear glass
    • Fine mesh catches tiny leaves
    • Easy to clean, microwave-safe
    • Versatile and affordable

    ⚠️ Cons

    • Glass lacks clay’s flavor-seasoning
    • Handle with care (glass)

    πŸ‘ Who it’s for

    • Beginners to Japanese tea
    • Those who want easy cleaning
    • Sencha and hojicha drinkers

    2. KINTO Unitea Teapot β€” Best Modern Design

    KINTO’s Unitea blends Japanese craftsmanship with sleek modern design. The heat-resistant glass body pairs with a generous stainless steel strainer that gives leaves room to expand fully, releasing more flavor and aroma.

    Minimalist and beautiful on any table, the Unitea is as much a design object as a teapot. It’s ideal for those who want contemporary style without sacrificing brewing quality β€” and it doubles beautifully for loose-leaf teas of all kinds.

    MaterialHeat-resistant glass + stainless
    FilterLarge stainless strainer
    Capacityapprox. 460–720ml options
    StyleMinimalist modern
    MakerKINTO

    βœ… Pros

    • Beautiful modern design
    • Large strainer for full leaf expansion
    • Versatile for all loose teas
    • Quality build, great gift

    ⚠️ Cons

    • Premium price for a glass pot
    • Strainer cleaning needs care

    πŸ‘ Who it’s for

    • Lovers of modern design
    • Those who want a centerpiece teapot
    • Gift buyers

    3. Tokoname-yaki Kyusu β€” Best Traditional Clay Teapot

    For the most authentic sencha experience, nothing beats a Tokoname-yaki kyusu β€” a side-handle clay teapot from Japan’s famous Tokoname pottery region. The iron-rich clay subtly mellows the tea and, many say, improves the flavor the more you use it.

    Most feature a fine integrated ceramic mesh (sasame) for a clean pour. A true piece of Japanese craft heritage, the Tokoname kyusu is the choice of serious green-tea drinkers who want the deepest, smoothest sencha and gyokuro.

    MaterialTokoname clay (iron-rich)
    FilterIntegrated ceramic mesh
    Capacityapprox. 300–360ml typical
    Best forSencha, gyokuro
    OriginTokoname, Japan

    βœ… Pros

    • Mellows and deepens sencha flavor
    • Authentic Japanese craft heritage
    • Fine integrated mesh, clean pour
    • Improves with use

    ⚠️ Cons

    • Hand-wash only, no soap
    • More care than glass/porcelain

    πŸ‘ Who it’s for

    • Serious sencha/gyokuro drinkers
    • Those wanting authentic craft
    • Green-tea enthusiasts

    4. Nambu Tetsubin Cast Iron Teapot β€” Best Statement Piece

    The Nambu tetsubin from Iwate Prefecture is one of Japan’s most iconic crafts β€” a cast-iron teapot prized for superb heat retention and timeless beauty. An enamel-lined tetsubin keeps your tea hotter for longer and makes a breathtaking centerpiece.

    Heavy, durable, and often passed down for generations, a tetsubin is as much heirloom as teapot. Choose an enamel-lined version for serving tea (un-lined types are for boiling water only). A stunning gift and a lifelong companion for tea lovers.

    MaterialCast iron (Nambu tekki)
    LiningEnamel-lined (for tea)
    StrengthExcellent heat retention
    OriginIwate, Japan
    NoteHand-dry to prevent rust

    βœ… Pros

    • Superb heat retention
    • Breathtaking heirloom-quality piece
    • Extremely durable
    • Iconic Japanese craft

    ⚠️ Cons

    • Heavy; careful drying needed
    • Enamel vs un-lined matters (check use)

    πŸ‘ Who it’s for

    • Those wanting a statement centerpiece
    • Gift buyers seeking ‘wow’
    • Tea lovers who value heirlooms

    5. Japanese Matcha Set (Chawan + Chasen + Chashaku) β€” Best for Matcha

    If you love matcha, a proper matcha set is essential. A complete set includes a chawan (wide bowl), a chasen (bamboo whisk with 80+ fine prongs), and a chashaku (bamboo scoop) β€” everything you need to whisk authentic, frothy matcha at home.

    The wide bowl gives the whisk room to move, while the fine bamboo prongs create the signature smooth, creamy foam. Far better than a regular cup and spoon, a matcha set turns your daily matcha into a proper ritual. Many come with a whisk holder too.

    IncludesChawan bowl, chasen whisk, chashaku scoop
    WhiskBamboo, 80+ prongs ideal
    Best forWhisking matcha
    BonusWhisk holder often included
    OriginJapan

    βœ… Pros

    • Everything needed for real matcha
    • Wide bowl + fine whisk = creamy foam
    • Turns matcha into a ritual
    • Great value complete set

    ⚠️ Cons

    • Bamboo whisk needs gentle care
    • Quality varies β€” choose 80+ prong whisk

    πŸ‘ Who it’s for

    • Matcha lovers
    • Beginners starting matcha at home
    • Gift buyers for tea fans

    Quick Comparison Table

    TeawareBest forMaterialBest teaNote
    Hario Chacha KyusuBeginnersGlassSencha/hojichaEasy clean
    KINTO UniteaModern designGlass+steelAll loose teasCenterpiece
    Tokoname KyusuAuthentic senchaClaySencha/gyokuroImproves with use
    Nambu TetsubinStatement pieceCast ironServing teaHeirloom
    Matcha SetMatchaCeramic+bambooMatchaComplete kit

    Final Verdict

    Start with the Hario Chacha Kyusu for easy, beautiful brewing, or the KINTO Unitea for modern design. For the deepest sencha flavor, invest in a Tokoname clay kyusu; for a stunning heirloom, the Nambu tetsubin; and if matcha is your passion, a complete matcha set is a must.

    Quality Japanese teaware elevates every cup β€” and with worldwide shipping via Amazon and Buyee, authentic pieces from Japan are easy to bring home.

    Frequently Asked Questions

    What teapot is best for Japanese green tea?

    A kyusu with a fine integrated mesh filter is ideal. Glass (like Hario) is easiest for beginners; a Tokoname clay kyusu gives the deepest, smoothest sencha flavor and improves with use.

    Can I make matcha in a teapot?

    No β€” matcha is whisked, not steeped. You need a matcha set with a chawan (bowl) and chasen (bamboo whisk) to create the proper frothy texture. A teapot is for leaf teas like sencha and hojicha.

    How do I care for a cast-iron tetsubin?

    Hand-rinse with water (no soap), dry thoroughly and immediately to prevent rust, and let it air-dry with residual heat. Use an enamel-lined tetsubin for serving tea; un-lined ones are only for boiling water.

    Is clay or glass better for a kyusu?

    Glass is easier to clean and lets you watch the brew, ideal for beginners. Clay (Tokoname) subtly improves sencha flavor and is favored by enthusiasts, but needs more careful hand-washing without soap.

  • Best Japanese Whetstones & Knife Sharpeners 2026: 5 Top Picks (Tested)

    Best Japanese Whetstones & Knife Sharpeners 2026: 5 Top Picks (Tested)

    Why You Need a Japanese Whetstone in 2026

    A great Japanese knife is only as good as its edge β€” and nothing restores a razor-sharp edge like a Japanese whetstone. While pull-through sharpeners grind away metal and damage thin Japanese blades, a water whetstone polishes a precise, long-lasting edge that protects your investment for decades.

    Whetstones can look intimidating, but the basics are simple, and Japan makes the best stones in the world. This guide explains how to choose and use a whetstone, then recommends 5 outstanding Japanese sharpening stones and tools for 2026 β€” from a beginner-friendly combination stone to a pro-grade ceramic β€” all available worldwide via Amazon and Buyee. (Pairs perfectly with our guide to the best Japanese kitchen knives.)

    How to Choose a Japanese Whetstone

    Understanding grit numbers

    Grit measures how coarse or fine a stone is. A coarse stone (#220–#400) repairs chips and very dull edges; a medium stone (#800–#1000) is the everyday workhorse for sharpening; a fine stone (#3000–#8000) polishes and refines for a mirror, razor edge. For most home cooks, a #1000/#6000 combination stone covers everything you need.

    Combination vs. single-grit stones

    A double-sided combination stone (e.g. #1000/#6000) is the best value and ideal for beginners β€” one stone does both sharpening and polishing. Serious sharpeners prefer separate single-grit stones for better size and control, building a progression of coarse, medium, and fine.

    Soaking vs. splash-and-go

    Traditional water stones must soak in water for 5–10 minutes before use. ‘Splash-and-go’ ceramic stones (like Shapton and Naniwa) need only a splash of water, making them faster and more convenient β€” great if you sharpen often or dislike the mess.

    Angle and technique

    Hold the blade at a consistent 15–20Β° angle (about the width of two coins under the spine) and push across the stone with light pressure. Many beginner kits include an angle guide. Keep the stone wet, raise a slight burr on each side, then finish on the fine grit.

    Maintenance: keep your stone flat

    Stones wear hollow over time, which ruins your edge. Use a flattening (nagura) stone or sandpaper to keep the surface flat. Dry stones fully before storing to prevent cracking, and never use cooking oil β€” water only.

    The 5 Best Japanese Whetstones & Sharpeners in 2026

    1. King KW65 1000/6000 Combination Stone β€” Best for Beginners

    The King KW65 is the whetstone almost every beginner starts with, and for good reason. This dual-sided water stone pairs a #1000 grit for everyday sharpening with a #6000 grit for polishing to a keen, refined edge β€” everything a home cook needs in one affordable stone.

    Made by Matsunaga (King), Japan’s most trusted whetstone maker, it’s forgiving, effective, and inexpensive. Soak it for a few minutes and you’re ready to bring any kitchen knife back to razor sharpness. The perfect first stone.

    TypeCombination water stone
    Grit#1000 / #6000
    UseSoak before use
    MakerKing (Matsunaga)
    Price rangeapprox. $35–50

    βœ… Pros

    • Unbeatable value for beginners
    • Both sharpening and polishing in one stone
    • Made by Japan’s most trusted brand
    • Forgiving and easy to learn on

    ⚠️ Cons

    • Requires soaking before use
    • Wears faster than premium ceramics

    πŸ‘ Who it’s for

    • First-time whetstone users
    • Home cooks wanting one do-it-all stone
    • Anyone on a budget

    2. Shapton Kuromaku (Pro) #1000 β€” Best Splash-and-Go Ceramic

    A favorite of professional chefs and sharpening enthusiasts, the Shapton Kuromaku (‘Pro’) ceramic stone cuts fast and needs only a splash of water β€” no soaking. The hard ceramic removes metal quickly and stays flat longer than traditional stones.

    Each grit comes in a handy storage case that doubles as a base. The #1000 is the ideal everyday sharpening grit; pair it with a #5000 for polishing. If you sharpen often and want speed and convenience, the Kuromaku is hard to beat.

    TypeCeramic, splash-and-go
    Grit#1000 (range available)
    UseNo soaking needed
    MakerShapton
    Price rangeapprox. $40–60

    βœ… Pros

    • Fast cutting hard ceramic
    • Splash-and-go, no soaking
    • Stays flat longer
    • Pro-favorite, durable
    • Handy storage/base case

    ⚠️ Cons

    • Single grit (build a progression)
    • Pricier than basic combo stones

    πŸ‘ Who it’s for

    • Cooks who sharpen frequently
    • Those who want speed and convenience
    • Users building a multi-stone set

    3. Naniwa Chosera/Professional #1000 β€” Best Premium Stone

    The Naniwa Chosera (also sold as ‘Professional’) is widely regarded as one of the finest sharpening stones made. This premium splash-and-go stone offers superb feedback, fast cutting, and an exceptionally smooth, consistent finish prized by knife enthusiasts.

    Magnesia-bonded for a pleasant, muddy feel that gives great control, it raises a fine slurry that polishes beautifully. If you’ve caught the sharpening bug and want a stone that performs at the highest level, the Chosera is a benchmark.

    TypePremium splash-and-go
    Grit#1000 (range available)
    UseLight splash
    MakerNaniwa
    Price rangeapprox. $70–95

    βœ… Pros

    • Superb feedback and control
    • Fast cutting, smooth finish
    • Top-tier quality
    • Minimal soaking needed

    ⚠️ Cons

    • Premium price
    • Single grit

    πŸ‘ Who it’s for

    • Enthusiasts who love sharpening
    • Those wanting the best finish
    • Owners of premium knives

    4. Suehiro Cerax 1000/3000 β€” Best Value Combination

    The Suehiro Cerax 1000/3000 is a fantastic mid-range combination stone that punches well above its price. The #1000 side handles everyday sharpening while the #3000 refines the edge to a clean, sharp finish β€” a great step up from basic beginner stones.

    Suehiro is a respected Japanese maker, and the Cerax cuts quickly with a pleasant feel and minimal soaking. It’s an excellent choice for anyone who wants better performance than an entry stone without paying premium prices.

    TypeCombination stone
    Grit#1000 / #3000
    UseBrief soak
    MakerSuehiro
    Price rangeapprox. $45–65

    βœ… Pros

    • Great value combination stone
    • Fast cutting, pleasant feel
    • Step up from beginner stones
    • Respected Japanese maker

    ⚠️ Cons

    • #3000 finish less mirror-like than #6000+
    • Combination size smaller than singles

    πŸ‘ Who it’s for

    • Cooks ready to upgrade from a basic stone
    • Value seekers wanting quality
    • Those wanting one versatile stone

    5. MinoSharp Plus 3 (by Global) β€” Best Easy Pull-Through Sharpener

    Not everyone wants to learn freehand stones β€” and the MinoSharp Plus 3 is the best easy option for Japanese knives. Designed by Global, this ceramic water sharpener uses spinning ceramic wheels and a water reservoir to gently sharpen thin Japanese blades without the aggressive grinding of cheap pull-throughs.

    Three stages (coarse, medium, fine) let you maintain and refine an edge in seconds, no skill required. It’s the perfect choice for keeping Japanese knives sharp at home with zero fuss β€” especially for Global and other double-bevel knives.

    TypeCeramic water sharpener
    Stages3 (coarse/medium/fine)
    UseAdd water, pull through
    MakerMinoSharp (Global)
    Price rangeapprox. $50–70

    βœ… Pros

    • No skill required
    • Gentle ceramic wheels (knife-safe)
    • Fast everyday maintenance
    • Great for Global/double-bevel knives

    ⚠️ Cons

    • Less precise than freehand stones
    • Not for single-bevel knives

    πŸ‘ Who it’s for

    • Those who don’t want to learn stones
    • Busy cooks wanting quick touch-ups
    • Owners of Global and Western-style knives

    Quick Comparison Table

    Stone / ToolBest forGritTypePrice
    King KW65Beginners#1000/#6000Combination$35–50
    Shapton KuromakuFrequent sharpening#1000Ceramic splash-go$40–60
    Naniwa ChoseraPremium finish#1000Premium splash-go$70–95
    Suehiro CeraxBest value combo#1000/#3000Combination$45–65
    MinoSharp Plus 3Easy / no skill3 stagesPull-through$50–70

    Final Verdict

    If you’re new to sharpening, start with the King KW65 β€” it does everything for very little money. Sharpen often? The Shapton Kuromaku is fast and convenient. Want the very best finish, go Naniwa Chosera; want great value, the Suehiro Cerax; and if you’d rather not learn stones at all, the MinoSharp Plus 3 keeps your knives sharp in seconds.

    A whetstone is the single best companion to a quality Japanese knife β€” and with worldwide shipping via Amazon and Buyee, keeping your blades razor-sharp has never been easier.

    Frequently Asked Questions

    What grit whetstone should a beginner buy?

    A #1000/#6000 combination stone like the King KW65 is ideal. The #1000 side sharpens dull edges and the #6000 side polishes them keen β€” covering everything most home cooks need in one affordable stone.

    Can I use a pull-through sharpener on Japanese knives?

    Avoid cheap carbide pull-throughs β€” they grind away metal and can chip thin, hard Japanese blades. If you want a pull-through, use a gentle ceramic water sharpener like the MinoSharp Plus 3, designed for Japanese double-bevel knives.

    How often should I sharpen my knife?

    With regular home use, sharpen on a whetstone every few weeks to couple of months, depending on use. Hone or strop more often to maintain the edge between full sharpenings.

    Do I need to soak my whetstone?

    Traditional water stones (like the King KW65) need 5–10 minutes of soaking. ‘Splash-and-go’ ceramic stones (Shapton, Naniwa) only need a splash of water and are ready immediately.

  • Best Japanese Kitchen Knives 2026: 5 Top Picks (Tested Brands, Worldwide Shipping)

    Best Japanese Kitchen Knives 2026: 5 Top Picks (Tested Brands, Worldwide Shipping)

    Why Japanese Kitchen Knives Are Worth It in 2026

    Anyone who has cooked with a genuine Japanese kitchen knife knows the feeling: tomatoes that fall apart into paper-thin slices, onions that don’t make you cry, and a clean, effortless glide through fish and herbs. Japanese knives are prized worldwide for their razor-sharp edges, hard high-carbon steel, and beautiful craftsmanship rooted in centuries of swordsmithing tradition.

    But with so many brands, steels, and blade shapes, choosing your first (or next) Japanese knife can be confusing. Should you get a santoku or a gyuto? Is Damascus steel worth it? What about maintenance? This guide breaks down everything you need to know and recommends 5 outstanding Japanese knives for 2026 β€” from an affordable beginner pick to a stunning luxury blade β€” all available to ship worldwide via Amazon and Buyee.

    How to Choose a Japanese Kitchen Knife

    Gyuto vs. Santoku: which blade shape?

    A gyuto is the Japanese take on a Western chef’s knife β€” longer (200–240mm), with a curved belly that suits both rocking and push cuts. It’s the most versatile all-rounder. A santoku is shorter (165–180mm), lighter, and flatter, making it easier to control for beginners and ideal for precise up-and-down chopping. If you want one do-it-all knife, choose a gyuto; if you want something nimble and beginner-friendly, choose a santoku.

    Steel type and hardness

    Japanese knives use harder steel (often 60–63 HRC) than Western knives, which lets them take and hold a much keener edge. VG10 and VG-MAX are popular stainless steels that balance sharpness and easy care; SG2/R2 powdered steel holds an edge even longer but costs more. Harder steel is sharper but slightly more brittle, so avoid bones and frozen food.

    Single vs. double bevel

    Traditional Japanese knives like yanagiba are single-bevel (sharpened on one side) for ultimate precision but require skill. For everyday home cooking, choose a double-bevel knife β€” sharpened on both sides like Western knives β€” which is far more forgiving and works for both right- and left-handed cooks.

    Maintenance and care

    Japanese knives reward a little care. Hand-wash and dry immediately (never the dishwasher), use a wooden or plastic cutting board (not glass or stone), and hone or sharpen on a whetstone every few weeks of regular use. Stainless steels like VG10 resist rust; carbon steels need extra drying but get even sharper.

    Budget: how much should you spend?

    A great entry-level Japanese knife starts around $60–80 and will already outperform most supermarket knives. The $120–180 range is the sweet spot for most home cooks, offering premium steel and fit-and-finish. Above $300 you enter collector/luxury territory with powdered steels and hand-finished Damascus.

    The 5 Best Japanese Kitchen Knives in 2026

    1. Tojiro DP Santoku β€” Best Budget Beginner Knife

    If you want to experience true Japanese sharpness without spending a fortune, the Tojiro DP Santoku is the knife almost every expert recommends first. It features a VG10 stainless steel core clad in two outer layers of softer stainless for durability, giving you a hard, keen edge that’s still easy to maintain.

    At around 170mm, it’s light and nimble β€” perfect for everyday vegetables, boneless meat, and fish. The simple, no-frills design keeps the price low while delivering the genuine ‘aha moment’ of Japanese cutlery. It’s the ideal first Japanese knife and a fantastic value.

    SteelVG10 core, 3-layer stainless
    Blade length170mm (santoku)
    EdgeDouble bevel
    Hardnessapprox. 60 HRC
    Price rangeapprox. $60–75

    βœ… Pros

    • Genuine VG10 sharpness at a low price
    • Lightweight and easy to control
    • Easy to maintain (stainless)
    • Trusted brand recommended for beginners

    ⚠️ Cons

    • Plain looks compared to premium knives
    • Basic handle comfort

    πŸ‘ Who it’s for

    • First-time Japanese knife buyers
    • Cooks who want maximum value
    • Anyone upgrading from supermarket knives

    2. MAC MTH-80 Professional Hollow Edge β€” Best All-Rounder

    Frequently crowned the best chef’s knife by testing labs, the MAC MTH-80 is an 8-inch gyuto-style blade beloved by professionals and home cooks alike. Its thin, hard high-carbon steel takes an extremely sharp edge, while the dimpled hollow edge helps food release cleanly instead of sticking.

    The MTH-80 is light, balanced, and astonishingly versatile β€” equally at home slicing, dicing, and mincing. If you want a single knife that does almost everything brilliantly and feels great in the hand, this is the one to beat.

    SteelHigh-carbon cutlery steel
    Blade length200mm (8″, gyuto)
    EdgeDouble bevel, hollow dimples
    Hardnessapprox. 59–61 HRC
    Price rangeapprox. $140–150

    βœ… Pros

    • Consistently rated #1 all-round chef’s knife
    • Razor-sharp, thin blade
    • Hollow edge reduces sticking
    • Excellent balance and agility

    ⚠️ Cons

    • Pricier than entry-level options
    • Carbon steel needs careful drying

    πŸ‘ Who it’s for

    • Cooks who want one do-it-all knife
    • Home chefs ready to invest once
    • Anyone who values cutting performance above all

    3. Shun Classic 8″ Chef’s Knife β€” Best Premium Damascus

    Shun’s Classic line is the knife that introduced millions to premium Japanese cutlery, and for good reason. A VG-MAX ‘super steel’ core is layered with 68 folds of Damascus stainless, creating a gorgeous flowing pattern that’s as functional as it is beautiful β€” it reduces sticking and resists corrosion.

    The D-shaped PakkaWood handle is comfortable and grippy, and the 16Β° edge is scary sharp out of the box. Shun also offers free lifetime sharpening, making this a premium knife you can keep razor-keen for years. It’s the perfect ‘treat yourself’ chef’s knife.

    SteelVG-MAX core, 68-layer Damascus
    Blade length200mm (8″, gyuto)
    EdgeDouble bevel, 16Β°
    Hardnessapprox. 60–61 HRC
    Price rangeapprox. $160–185

    βœ… Pros

    • Stunning Damascus looks
    • Very sharp VG-MAX steel
    • Comfortable D-shaped handle
    • Free lifetime sharpening from Shun

    ⚠️ Cons

    • Premium price
    • Harder steel: avoid bones/twisting

    πŸ‘ Who it’s for

    • Cooks who want beauty and performance
    • Gift buyers seeking a ‘wow’ knife
    • Anyone wanting a long-term premium blade

    4. Global G-2 8″ Chef’s Knife β€” Best Iconic Stainless

    Instantly recognizable by its seamless, all-stainless one-piece design, the Global G-2 is a modern classic found in professional kitchens worldwide. Made from Global’s proprietary CROMOVA 18 stainless steel, the blade is sharp, highly rust-resistant, and incredibly easy to clean β€” there are no seams or rivets where bacteria can hide.

    The hollow handle is filled with sand for perfect balance and has a distinctive dimpled grip. Lightweight and durable, the G-2 is a superb choice for cooks who want an easy-care, hygienic, dishwasher-tough knife with timeless style.

    SteelCROMOVA 18 stainless, one-piece
    Blade length200mm (8″, gyuto)
    EdgeDouble bevel
    Hardnessapprox. 56–58 HRC
    Price rangeapprox. $110–130

    βœ… Pros

    • Iconic seamless, hygienic design
    • Highly rust-resistant and easy to clean
    • Lightweight with great balance
    • Durable everyday workhorse

    ⚠️ Cons

    • Dimpled handle can feel slippery to some
    • Slightly softer steel than premium picks

    πŸ‘ Who it’s for

    • Cooks who prioritize easy care and hygiene
    • Fans of modern, minimalist design
    • Busy kitchens wanting a tough daily knife

    5. Miyabi Birchwood SG2 5000MCD 8″ β€” Best Luxury Knife

    For the cook who wants the absolute best, the Miyabi Birchwood is arguably the most beautiful production knife in the world. A micro-carbide SG2 powdered-steel core is wrapped in 100 layers of Damascus and finished with a hand-honed Honbazuke 9.5Β° edge that’s extraordinarily keen and holds for an exceptionally long time.

    The genuine Karelian birchwood handle is a work of art, and the flower-pattern Damascus is breathtaking. This is a luxury blade that performs as spectacularly as it looks β€” a centerpiece for serious cooks and collectors.

    SteelSG2 micro-carbide core, 100-layer Damascus
    Blade length200mm (8″, gyuto)
    EdgeHonbazuke, 9.5Β° per side
    Hardnessapprox. 63 HRC
    Price rangeapprox. $350–400

    βœ… Pros

    • Exceptional SG2 edge retention
    • Breathtaking 100-layer Damascus
    • Luxurious Karelian birch handle
    • A true heirloom-quality knife

    ⚠️ Cons

    • Premium luxury price
    • Hard steel needs careful use and a whetstone

    πŸ‘ Who it’s for

    • Serious cooks and collectors
    • Special-occasion gift buyers
    • Anyone wanting the very best

    Quick Comparison Table

    KnifeBest forSteelLengthPrice
    Tojiro DP SantokuBudget / beginnerVG10170mm$60–75
    MAC MTH-80Best all-rounderHigh-carbon200mm$140–150
    Shun Classic 8″Premium DamascusVG-MAX200mm$160–185
    Global G-2Iconic / easy careCROMOVA 18200mm$110–130
    Miyabi BirchwoodLuxury / heirloomSG2200mm$350–400

    Final Verdict

    There’s no single ‘best’ Japanese knife β€” only the best one for you. For most people starting out, the Tojiro DP Santoku delivers unbeatable value, while the MAC MTH-80 is the all-rounder to buy if you want one knife for life. Choose the Shun Classic for beauty and performance, the Global G-2 for easy, hygienic care, and the Miyabi Birchwood when only the best will do.

    Whichever you pick, a quality Japanese knife will transform your cooking β€” and with worldwide shipping via Amazon and Buyee, an authentic blade from Japan is just a click away.

    Frequently Asked Questions

    Are Japanese knives better than German knives?

    They serve different needs. Japanese knives use harder steel for a sharper, thinner edge that excels at precise slicing, while German knives are heavier and tougher for rough tasks. Many cooks own both, but for everyday sharpness most prefer a Japanese blade.

    Can I put a Japanese knife in the dishwasher?

    No. Always hand-wash and dry your Japanese knife immediately. Dishwashers dull and can corrode the blade, and the high heat can damage wooden handles. Proper care keeps the edge sharp for years.

    Santoku or gyuto for a beginner?

    A santoku is generally easier for beginners β€” it’s shorter, lighter, and flatter for simple chopping. A gyuto is more versatile but a little longer. Both are excellent; pick the santoku if you want maximum control.

    How do I keep my Japanese knife sharp?

    Use a whetstone (around 1000/6000 grit) every few weeks of regular use, and store the knife on a magnetic strip or in a sheath rather than loose in a drawer. Avoid cutting bones, frozen food, or using glass cutting boards.

  • Best Japanese Bidet Toilet Seats 2026: 7 Washlets to Buy (TOTO, Panasonic & More)

    Best Japanese Bidet Toilet Seats 2026: 7 Washlets to Buy (TOTO, Panasonic & More)

    Japan’s heated bidet toilet seats β€” famously known as washlets β€” are one of the things visitors love most and want to take home. Warm water cleansing, a heated seat, deodorizer and a dryer turn an everyday routine into pure comfort. This guide covers the 7 best Japanese bidet toilet seats in 2026, with links to buy from anywhere in the world.

    Why a Japanese bidet seat is worth it

    • Hygiene & comfort: warm-water cleansing is gentler and cleaner than paper alone.
    • Heated seat: no more cold winter mornings.
    • Eco & savings: less toilet paper over time.
    • Easy to install: most attach to your existing toilet in under an hour.

    Before you buy: will it fit?

    Most washlets fit standard elongated or round toilets, but check the shape and mounting-hole distance. Electric models need a nearby power outlet. Outside Japan, choose a model rated for your voltage (110V for North America) or a non-electric model. Renters: a non-electric attachment is easiest.

    The 7 best Japanese bidet toilet seats in 2026

    1. TOTO Washlet β€” The original and the benchmark

    TOTO invented the modern washlet and remains the gold standard, with adjustable warm water, heated seating, air dryer, deodorizer and premium build. The S-series and C-series are popular. For the authentic Japanese experience, start here.

    2. Panasonic Bidet Toilet Seat β€” Smart and hygienic

    Known for antibacterial nozzles, stain-resistant coatings and energy-saving modes. A reliable, tech-forward alternative to TOTO with excellent everyday usability.

    3. Brondell Swash β€” Best for North America (110V)

    Brings Japanese-style washlet comfort to North American bathrooms with 110V compatibility and easy installation: warm water, heated seat, dryer and remote. A top pick if you live outside Japan.

    4. Bio Bidet β€” Feature-rich value

    Feature-packed electric seats (warm water, heated seat, dryer, night light) at competitive prices, widely available internationally. Great value for full features without the premium price.

    5. Entry-level Japanese warm-water seats β€” Simple and affordable

    For a no-fuss warm-water seat with the essentials, entry-level electric models from trusted Japanese makers deliver the core experience at a friendlier price.

    6. TUSHY β€” Non-electric attachment for renters

    A non-electric bidet attachment clips onto your existing toilet and uses water pressure only β€” no outlet needed. Affordable and renter-friendly.

    7. Portable travel bidet β€” Warm-water cleansing anywhere

    A rechargeable handheld bidet lets you enjoy cleansing on trips, camping or at the office β€” a clever companion to a home washlet.

    Electric vs non-electric β€” which to choose?

    Electric seats offer the full experience but need an outlet and matching voltage. Non-electric attachments are cheaper, renter-friendly and need no power but lack heating. Homeowners: go electric; renters/travelers: non-electric or portable.

    FAQ

    Will a Japanese washlet work outside Japan?
    Japanese 100V models need a transformer abroad. For 110V/North America choose Brondell or Bio Bidet; elsewhere check voltage or use non-electric.

    Is it hard to install?
    No β€” most attach in under an hour with basic tools.

    Are they hygienic?
    Yes; many have self-cleaning nozzles and antibacterial materials.

πŸ“–

0 guides available