This article was created with AI writing assistance (ChatGPT, Claude, etc.). Product selection, specifications, and reviews are verified by the Japan Life Lab editorial team.
This article contains promotional / affiliate links.
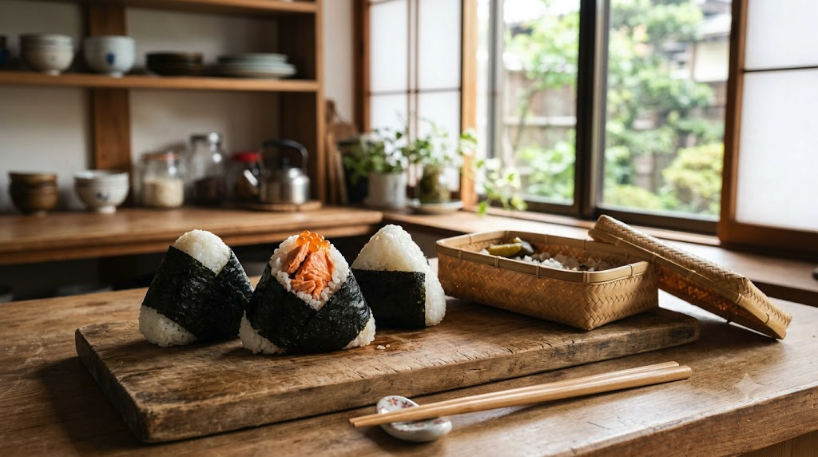
Onigiri — the humble Japanese rice ball — is the country’s original fast food: portable, endlessly customizable, and quietly perfect. If you’ve ever grabbed one from a konbini and wondered why yours fall apart at home, this guide is for you. We’ll cover the technique, the classic fillings, the gear that makes it foolproof, and the konbini secret to keeping nori crispy.
📌 What you will learn
You do not have to read it all — jump to what you need.
- The Rice Is 90% of the Battle
- The Technique: Press Gently, Three Times
- 5 Classic Fillings to Start With
- The Konbini Secret: Keep Nori Crispy
- Gear That Makes It Foolproof
- Storage Rules
- Beyond the Triangle: Yaki Onigiri
※ Start wherever fits your situation.
Prime members get fast, free delivery on millions of items, Prime Video and members-only deals. Eligible new members can try it free for 30 days.
Start your free 30-day Prime trial →Ages 18–24? See Prime for Young Adults
Paid links. As an Amazon Associate, Japan Life Lab earns from qualifying purchases. Trial eligibility and terms are set by Amazon.
The Rice Is 90% of the Battle
Onigiri needs Japanese short-grain rice (look for koshihikari or “sushi rice” labels). Long-grain rice won’t stick, period. Cook it slightly firm, then — this is the key — shape while the rice is hot enough to be almost uncomfortable. Warm rice sticks to itself; cold rice crumbles. Wet your hands with water, rub on a pinch of salt, and you’re ready.
The Technique: Press Gently, Three Times
Scoop a tennis-ball amount of rice, make a small well for the filling, cover it with rice, then press into a triangle by rotating three times between cupped palms. The secret is pressure: firm enough to hold, gentle enough that the rice stays fluffy. Squeeze hard and you get a dense rice brick. Three gentle presses, rotate, done.
5 Classic Fillings to Start With
- Sha-ke (salted salmon): grilled, flaked salmon — the king of onigiri
- Umeboshi (pickled plum): salty-sour, the traditional preservative center
- Tuna mayo: canned tuna + Japanese Kewpie mayo — the konbini bestseller
- Okaka: katsuobushi flakes moistened with soy sauce
- Kombu tsukudani: sweet-simmered kelp, deeply savory
The Konbini Secret: Keep Nori Crispy
Convenience stores wrap nori separately in plastic so it only touches the rice when you open it. At home, do the same: pack nori sheets separately and wrap just before eating. For bento boxes, cut nori into strips and add at lunchtime. Soggy nori is the #1 onigiri crime.
Gear That Makes It Foolproof
Onigiri molds turn the hand-shaping learning curve into a two-second press — great for kids’ bento and batch-making. Look for triangle molds with a press lid. Onigiri wrappers (the konbini-style film) keep nori separate until eating. A hangiri or flat bowl helps the rice cool evenly while staying moist. None of this is essential, but for daily bento-making, molds are a genuine time-saver.
Storage Rules
Onigiri are best within a few hours, wrapped in plastic at cool room temperature. Refrigeration makes rice hard — if you must refrigerate, microwave for 20–30 seconds to revive. For summer bento, stick to salted/pickled fillings (umeboshi, salted salmon) which resist spoilage; skip mayo-based fillings on hot days without a cooler pack.
Beyond the Triangle: Yaki Onigiri
Brush plain onigiri with soy sauce (or miso) and grill in a pan until the surface crisps into a golden crust. Yaki onigiri — crunchy outside, steamy inside — might be the single best thing you can make with leftover rice. Freeze plain onigiri, then pan-grill from frozen for an instant snack.
Final Thoughts
Hot rice, salted wet hands, three gentle presses, nori at the last second — that’s the whole art. Master the tuna-mayo triangle this week, and you’ll never look at a sad desk sandwich the same way again.
🍜 More Japanese Food Guides
🔥 Editor’s Picks for Life & Travel in Japan

Japan Expat Starter Kit 2026 PDF guide
Your first 90 days in Japan, step by step: 17 chapters · 24 pages · 100 phrases in Japanese script · 40 kanji · printable checklists. Bank account, My Number, health insurance, apartment, phone, taxes & pension.
$9.99 $4.99 current price
📥 Get the kit →📄 Read 5 pages free: contents + Chapter 2
⚡ Instant PDF download · 🛡️ 30-day money-back guarantee · 🔄 Free 2026 updates
Practical guides for life and travel in Japan — free, about once a week. No spam, unsubscribe anytime.
☕ Enjoying our Japan guides?
If this article helped you, you can support our work with a coffee!
Did this guide help you? 🍵
Japan Life Lab is a small independent blog, and every guide we publish is completely free — no paywalls, ever. If our work saved you time (or a headache), you can support us with a cup of Japanese tea. Every contribution, big or small, goes straight into keeping these guides free, accurate and up to date for everyone.
☕ Support Japan Life Lab
Leave a Reply